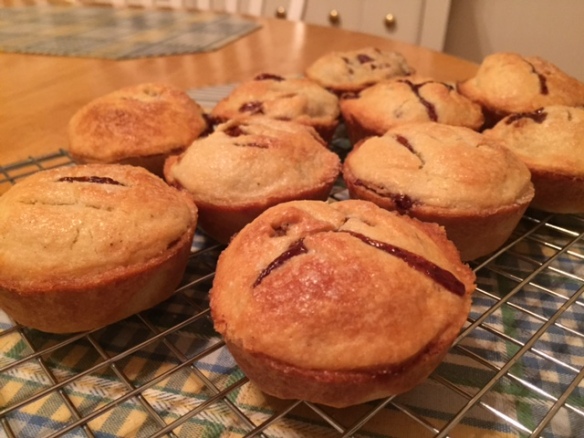
Apple Pielettes

IMG_0325

Aren’t these the cutest things!?

Our recipe has an introduction that tells us these were created as a bring-along for a potluck…I see them as an easy bring-along for a picnic too. Super easy to transport and eat…no utensils or plates necessary.

This is one of those recipes that has a base but you are able to change it around…any combination of fruit for the filling would work and while this recipe uses a galette dough, you could easily use your favorite pie crust dough as well.

I changed up the filling from the recipe and omitted the raisins and apricots and just went with my tried and true apple pie filling..why mess with it right? 🙂  I was also happy I got the “accident to be wished for” as the recipe states as my juice bubbled over into a caramel coating of drips.  It also gives them a bit of character! 🙂

IMG_0322

The one thing I did find a bit hard was the sizing of the dough.  I measured for what the recipe called for, but if I was to make these again, I would increase the size of both the tops and bottoms, that way you would have more room for filling.  As it was, the 3 inch bottoms didn’t seem really big and then the filling cooked down so some of them had gaps of air inside.  I would rather have packed in the apple filling with extra space and used up the full muffin tin.

IMG_0323

All in all, I would say these were a hit…especially with those of my tasters who love pie crust since there is such a big crust to filling ratio here…for me…the odd one… I would prefer a french apple topping but that would defeat the purpose of a “pielette” haha!

IMG_0324

Raspberry Swirls

IMG_0278

I made these a few weeks ago and people are still talking about them!..yes, that good!

I made “Blackberry Swirls” since I had blackberry jam leftover from our Florentine Squares, but really you could use any flavor jam and it would be a success.  These are the best kind of recipes because you can use what you have on hand!

There are a few steps to these swirls:

  • baking the cake; easy
  • chill time
  • spreading the jam and rolling the cake; fussy and not so easy
  • chill time
  • cutting the roll into pieces; easy
  • dip in chocolate, roll in coconut and pistachios; easy

Really the only difficult part I found, even with so many steps, was the rolling part…and it just seemed like it shouldn’t be so hard.  The cake didn’t want to roll up in a nice spiral, but I forced it and then wrapped it very tightly in the parchment paper.  I think the tight wrapping did help but,  in the end it just didn’t matter too much because the chocolate hid all imperfections!  While I was making them I was thinking that I wouldn’t be making them again, but after seeing how pretty they eventually turn out…they are very showy…AND how great everyone said they were, I would have to change my opinion.  I wouldn’t be so worried during the rolling part and would just go with it…they turn out beautiful and so tasty in the end!

Tiger Cakes

IMG_0299

I am not sure I understand why these are called Tiger Cakes…the recipe says it is because there are flecks of chocolate striping the cake but you only see them if you don’t opt to add the “dipped in ganache” step…who would want to skip that step??  Not me!

My daughter thinks  a better name, at least for my cakes, would be “Zebra Cakes”  since I took the “dipped in ganache” step a little farther and used some of my white melting chocolate left over from my chocolate strawberries this summer.  I have to agree. 🙂

This batter was a little different from any I can remember.  The main ingredients are almond four, egg whites, but you don’t whip them, and quite a lot of butter.  You bake them in a mini muffin tin so it makes 24 cakes.  The only thing I did not like about this recipe was how stubborn they were to remove from the pan.  I made sure to grease liberally after seeing some helpful hints and they were still not that easy to dislodge.  They came out in one piece but it gets old to have to work so hard at getting them released when there are 24 of them.

That problem aside, these were a fantastic surprise.  They don’t look like brownies, but they sure do taste like them; very chocolatey!  ALL of my tasters loved these….one said they were “DELICIOSO!!!!”  and my dad said he was needing to expand his top 10 to a top 25 category.  This “Baking Chez Moi” cookbook has been hit after hit.  I just love baking these new recipes but I have to say it is extra fun when everyone LOVES the result!!